

It seems like my #1 most frequently asked question seems to be, “How did you get that picture to look that way?” So I thought I’d do a little post about my camera bag & the equipment I like to use and how I go about getting the photo I do.
I really love natural light photography. I almost never use a flash. So that’s my #1 rule of thumb. Turn that flash off, baby! But wait! you cry. My photos look so blurry when I turn the flash off unless I’m outside! That’s where the equipment comes in.
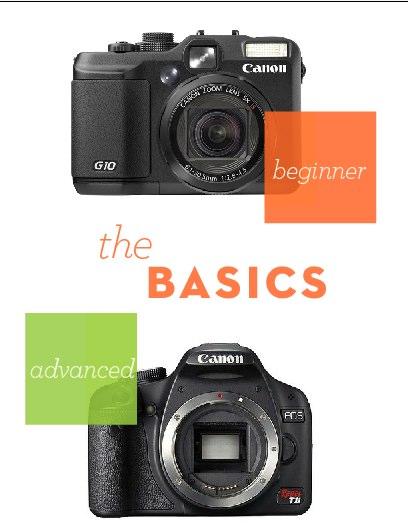
Let’s start with the basics: the camera body itself.
Full disclosure: I had basic understanding of manual features of cameras due to taking a photography course in college. Yay art school. However. This has been many many moons eons years and I needed a refresher. When Jude was born, I researched cameras & wanted something with more features and heftier visuals than your typical point-and-shoot. I was comfortable w/ the Canon way of doing things as I’d been shooting w/ Canons for years. Nikon is also an excellent camera company.
Reviews led me to the Canon G-Series (the G10 at the time) and I fell madly in love. I’m the biggest fan of this camera. The G-series camera is the camera in between a standard point & shoot and a full-range DSLR camera and you get crazy awesome results. Now, keep in mind that it’s been 4 years and now there’s, like, the G12 or more. But there doesn’t seem to be a ton of difference as time has gone on, so you could probably still land a great deal on an older G-series camera that shoots incredible photos if you choose not to pay full price.
I learned how to shoot in manual with this camera and I have never looked back. I rarely shoot in anything other than the manual, or “M” setting. This takes a lot of time and practice to learn how to do, so don’t get discouraged if you’re feeling like you’re slow at it. I’ll discuss how to learn to shoot in manual in a bit.
Now. After four years of shooting with my friend, the G-10, I upgraded to a Canon Rebel T1i. Again – my research led me to discover that there isn’t much difference between the original T1i, T2i, and the newest T3i. I also discovered that with a DSLR, the true magic is in the lens. My advice is to save your money on the camera body & invest in the lens.
Which leads me to the next topic — lenses!
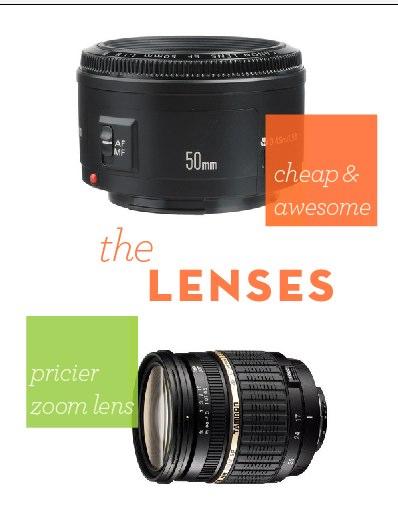
For truly beautiful background blur (called bokeh), I love the Canon Normal EF 50mm f/1.8 autofocus lens. It was CHEAP, guys. Like $130 cheap. Which in lens-world, is a steal of a deal. I shoot with this camera all the time and I love it because I can shoot in really low light and get great results. However – it is a stationery lens. There is no zoom on this. Remember, everything is manual w/ a DSLR. Also, I find there is some distortion to this lens and while it’s great on children, I wouldn’t use it as a, say, bridal or portrait lens on vain grown-ups b/c it makes your face look puffier than normal.
The next lens I’d like to invest in is this Tamron AF 17-50mm f2.8 zoom lens. Are you listening, Santa? I’m interested in this one for the wider angle and ability to shoot in low-light.
But what about the lens that comes w/ my DSLR? Well, I’ll be frank: it’s a piece of junk. It’s cheaply made, doesn’t take any better of a photo than a point-and-shoot, and almost never gets used. Save your money & purchase the body by itself and then go out & buy some good lenses. I’m serious as a heart attack.
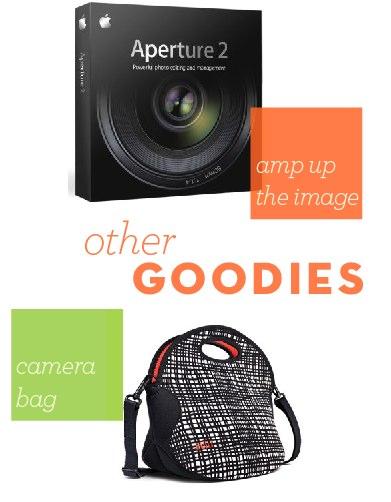
Finally, I do touch up most of my photos once I’ve uploaded them to my laptop. I started with iPhoto, which is a great program if you use a Mac. I’ve since upgraded to Aperture because I wanted some heftier photo-editing abilities paired with the good design of an Apple software product. I loved how simple iPhoto was to use; Aperture is that simple, but more well-rounded with features.
Why no Photoshop? Because I like the batch-editing abilities of Aperture. Plus I like the way Aperture stores & arranges my photos, similar to iPhoto. I can easily share them to Flickr, Facebook, etc through the in-app functions. Photoshop is just too clunky for me, to be honest. Plus I’m not really into actions, something that people frequently use to edit photos when they are Photoshop users. My aesthetic is more natural light and saturated color and I can achieve that by adjusting the exposure and amping up my contrast. Other than that, that’s all I really do to them.
So where do you go if you want to learn about photography? I highly recommend taking a class if you have the time. A class will encourage you to understand not only the technical side of photography, but the artistic nature of it, too. You can have all the best gear in the world, but if you can’t compose the image well, you’re still up a creek.
Oh, and finally, I really love the products by Built NY. They do sell a neoprene camera bag, but I ended up buying their lunch tote that’s smaller (and, erm, cheaper). It’s stretchy and keeps my stuff safe. I’ve carried it all over the place.
Photography influences & aides:
The Pioneer Woman. She has some excellent tutorials and guides to understanding aperture, etc.
Nicole Hill // A Little Sussy. Nicole is one of my favorite photographers. I love her use of natural light & understanding of color. She shoots gorgeous product photography in addition to portraiture. I would also highly recommend her textbook and classes, although I have not taken one of them (I would like to for a refresher!). Check out her camera bag to see what she recommends.
Whew! There you have it! The official Pencil Shavings guide to photography. Let me know if I can answer any questions!
You might also enjoy:
 How to Survive Growing Out Your Hair Posted in Style
 Here & There Posted in Living
 How to get better photos Posted in Living


